MAKE A POLICE LIGHT FOR YOUR BIKE.
The perfect accessory for your bike. A handy battery operated unit that will allow you to drive at extremely high speeds (including on the pavement/sidewalk), drive through red lights with impunity and quite probably arrest drunken people too.
OK, there is a risk that you'll get arrested for impersonating a police officer, but that's a minor technicality.
This project does carry a slight risk of imprisonment. I really don't recommend that you use this light in public areas.

Here's what the end result will look like.

The materials are very simple. A dollar store front bike light (clear white lens), some blue LEDs to replace the ones in the light and optionally a short piece of silicon aquarium tubing to assist with LED removal.
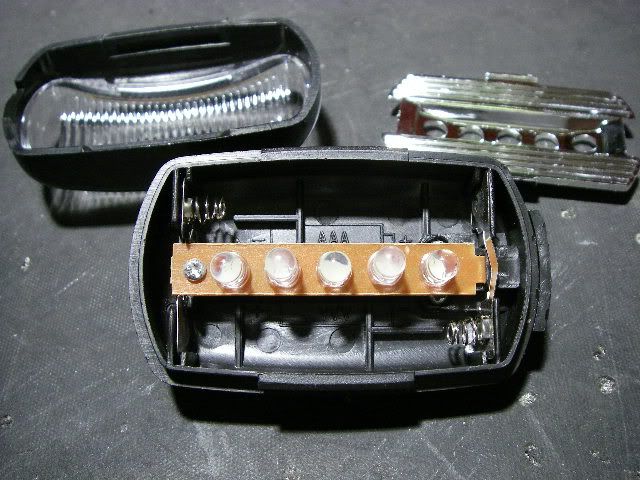
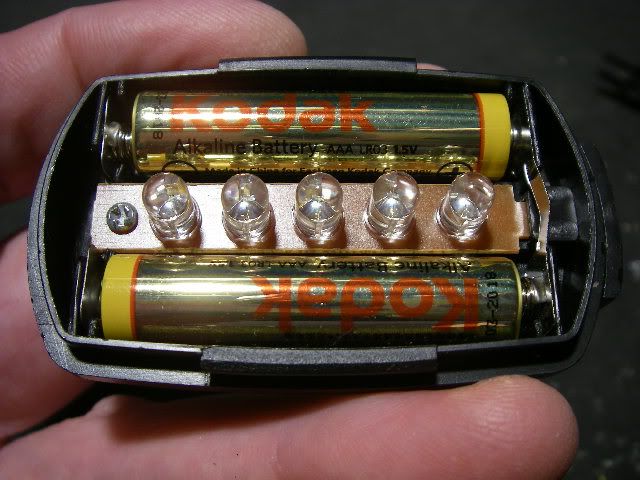
We start by opening the light. The front lens usually pops off to reveal a reflector, PCB and battery contacts.
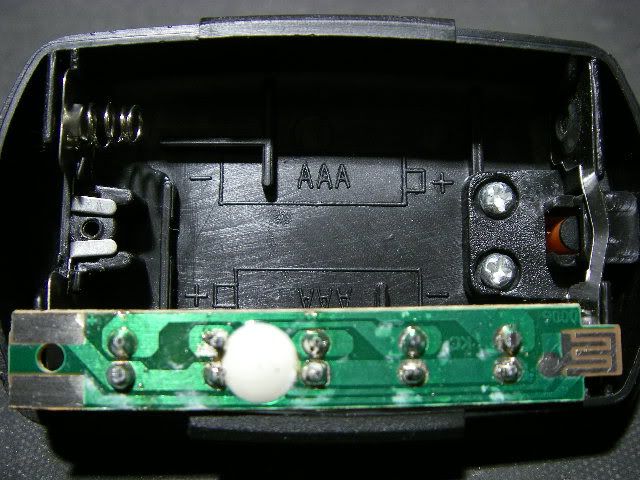
The PCB is usually removed by unscrewing a single screw at one end. That screw is used to secure the PCB while also forcing pads on the back of the PCB against the battery connections.
At the other end of the PCB there is usually a small cluster of PCB tracks that are hooked into a support in such a way that the conductive rubber power/mode button shorts the tracks together when it is pressed in.
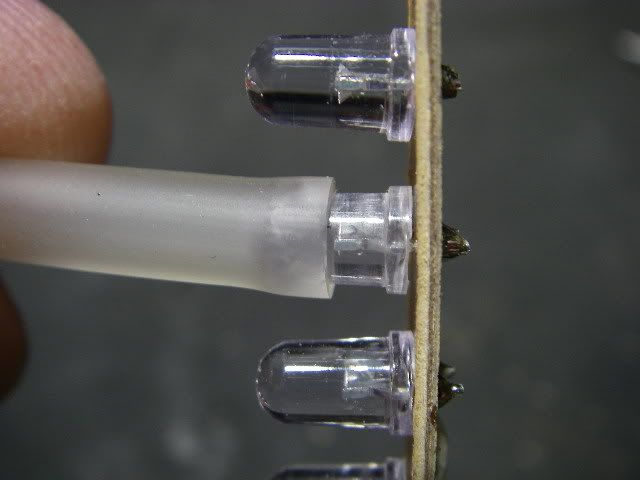
We start by noting the polarity of the original LEDs and marking the PCB accordingly. The anvil shaped electrode inside the LED is usually the negative. The (optional) silicon rubber tube is pressed onto each LED in turn to assist in removing them as they are desoldered.
Apply a soldering iron across the chosen LEDs pads to melt the solder while pulling the LED out with the silicon sleeve.
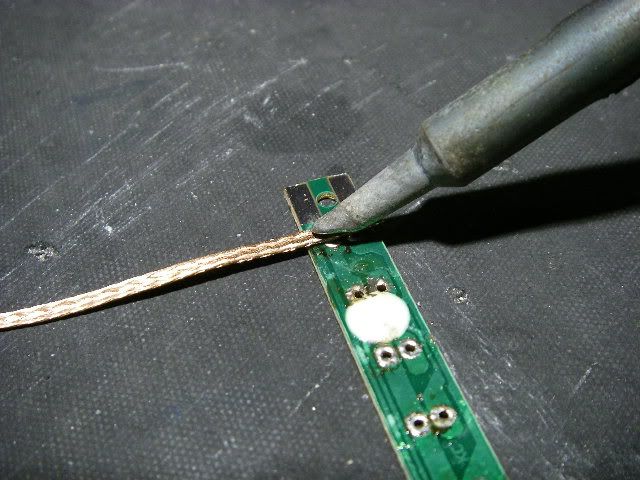
Once the LEDs have all been removed you can clean the excess solder off the pads using a bit of desoldering wick. This is a braided copper tape that is impregnated with flux. When you place it on a solder joint and heat it, the solder is sucked into the wick by capillary action.
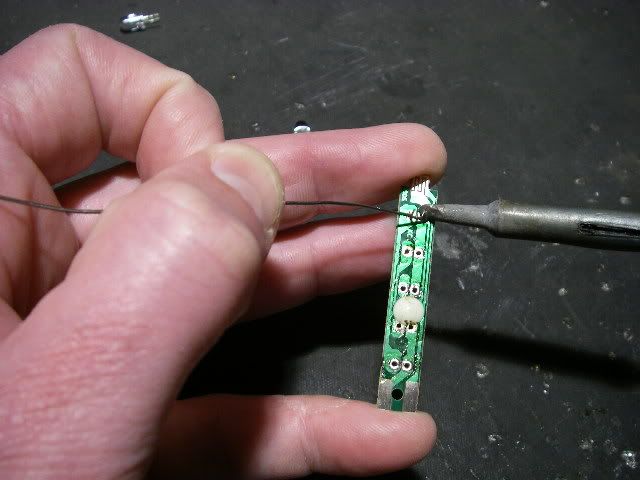
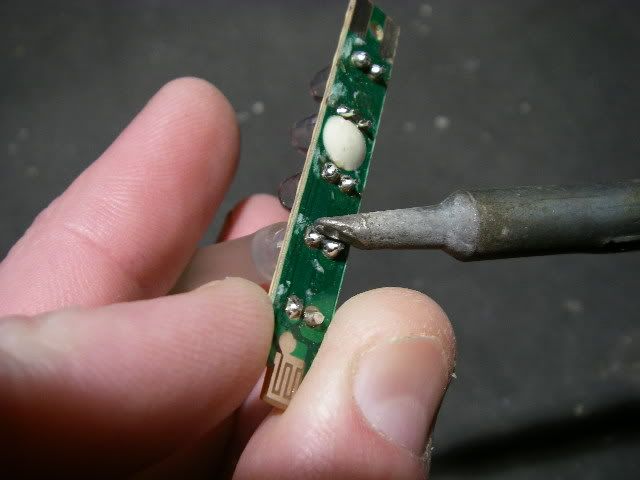
Now solder the new LEDs in, noting the polarity to ensure they are put in the correct way round. I prefer to solder just the positive lead of each LED first, then line them up if needed before soldering the other lead.
Note the multi-finger soldering technique. An important part of soldering is to hold three or more things simultaneously in one hand! You can see that I am holding and feeding the solder with my thumb and forefinger, gripping the PCB with my middle finger and pinky, and using the last finger to hold the LED in while it's soldered. looks tricky, but when you've been soldering as long as I have it becomes second nature.
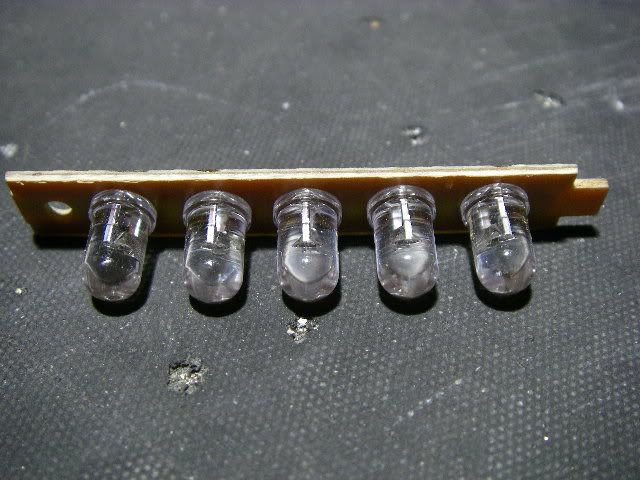
Once they have all been soldered in, crop the excess lead length at the back of the PCB.
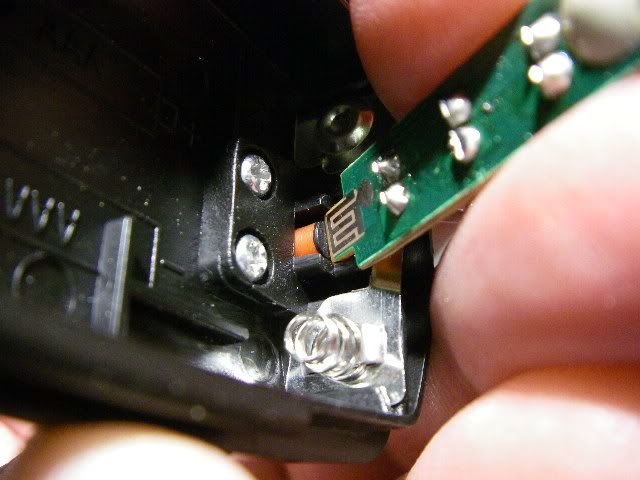
Slot the PCB back into the case, making sure that the button contact tracks fit in under their ledge in the case.
Then put the screw back in to lock the PCB in the case and mate the PCB pads to the battery contacts. Pop some fresh alkaline batteries in and then reassemble the light.
And there you go. A bright blue and probably highly illegal flashing "cop light" for your bike.