MAKE SOLAR WINDOW LIGHTS.
If you have a window in your home that catches a lot of sunlight at some point in the day, then this project is a fun way to add a dash of colour to your indoor windowsill. You already get sets of solar outdoor lights, but they often have 50 or more lights and that can be a bit too much for an indoor window application.
This project is a hack to combine two readily available devices to create some eye candy for your window area for just a few dollars.
This project carries a slight risk of a soldering iron burn, screwdriver impalement and falling through plate-glass windows while frolicking with pretty lights. As such you attempt this project entirely at your own risk.

Here's what we're aiming for. Just a simple string of about ten little LEDs that add a splash of luminous colour to your window area.
Oh yeah! I totally pushed the boat out on this project to the tune of just under 3 quid (a lot less than 5 bucks).
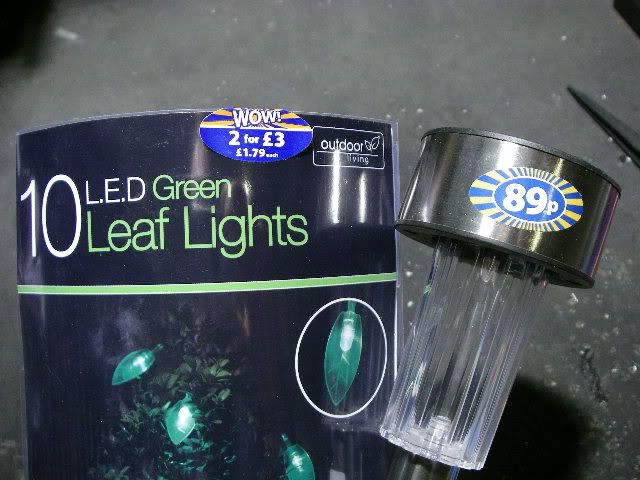
On the left we have a set of battery operated LED fairy lights and on the right a very cheap garden solar light.
There's no point trying to do this project from scratch, because you simply can't get the bare materials cheaper than these two products! I chose green lights because the green LEDs tend to give out a useful amount of light even at extremely low current. I picked both of these items up at BM Homestores in the UK.

Here's the circuitry usually found in battery operated solar lights. Not much, just the batteries, a switch, resistor and parallel string of LEDs. It's simpler and cheaper to buy this whole string and chop off the lights than it is to buy the bare LEDs and then have to solder and sleeve them. They also tend to be those rather nice side emitting LEDs with the inverted cone in the end to reflect the light out in all directions.
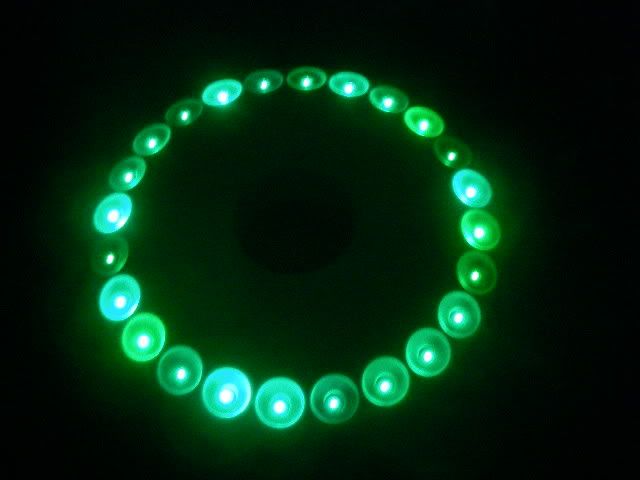
When you run a load of LEDs in parallel with a single resistor then they have to be well matched for forward voltage, otherwise the ones with the lowest voltage tend to hog the current and you get major intensity variation as demonstrated in the light above. Battery operated LED strings tend to have well matched LEDs from common batches.
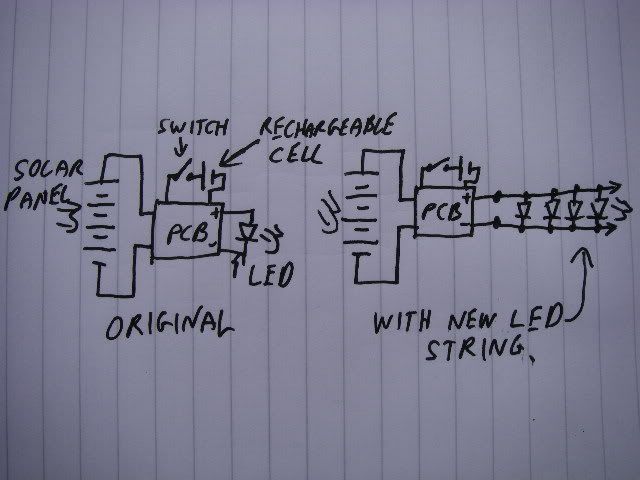
And here's a rough schematic of a typical solar light before and after the simple hack. They have a solar cell, switch, single cell rechargeable battery, LED, inductor and a rather nifty four pin chip or COB (Chip On Board) that acts as a series diode to prevent reverse feeding the solar cell, light sensor (using the output from the solar cell) and step-up converter which switches the inductor at high frequency to step up the voltage to drive the LED in the same style as a Joule Thief circuit.
On the right is the hack, which is as simple as replacing the original single LED with the string of LEDs. The current will be shared between the LEDs and they will be dimmer than the single LED, but just fine for directly viewed lights.
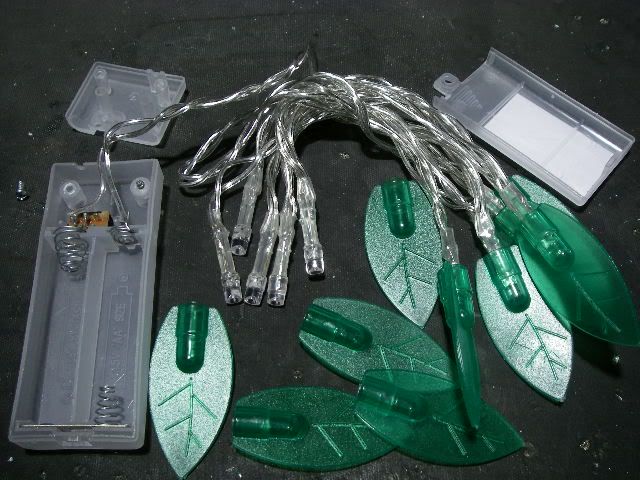
Here's the string of lights I used. They are 10green LEDs with press fit rubbery leaves that can be left on or pulled off as desired. Note that this set of lights does not use a resistor, and only has a 2 x AA battery holder. It relies on the fact that 2 AA cells will produce a maximum volatge of about 3V and green LEDs will only pass about 20mA at 3V, gradually dropping the current drawn as the battery voltage falls. It's a bit naughty not to use a resistor, but will work acceptably. However, we're chopping the string of LEDs off anyway, so who cares.
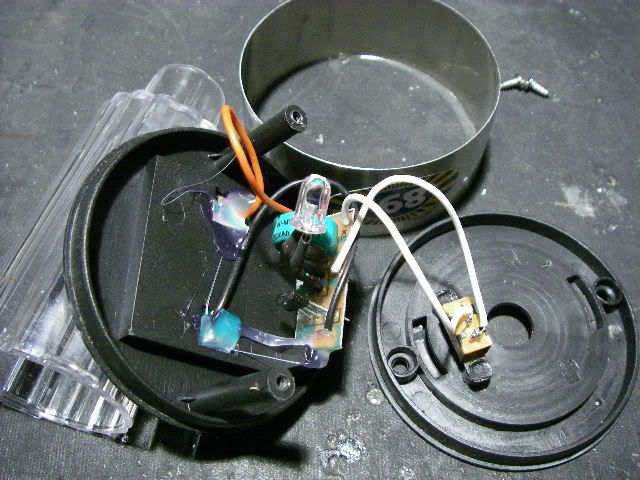
The inside of the solar light is very minimalist. The solar cell (red and black wires), the PCB with the rechargeable cell, LED and control circuitry built on it, and the switch.
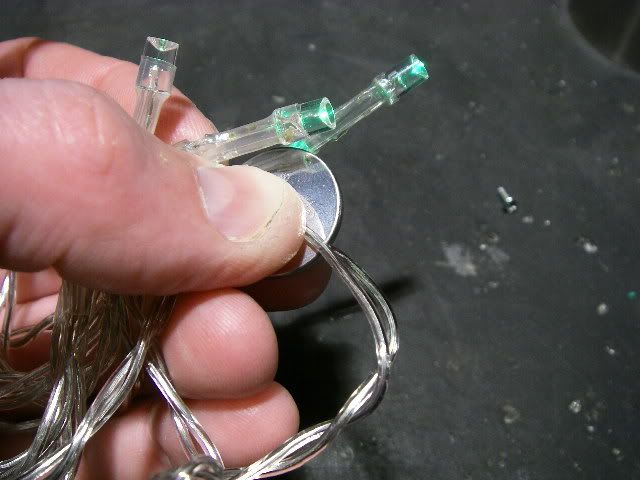
If you're not sure about the polarity of your chopped LED string then you can strip the ends of the wires and touch them to either side of a standard 3V lithium button cell. They will light up when applied with the correct polarity.
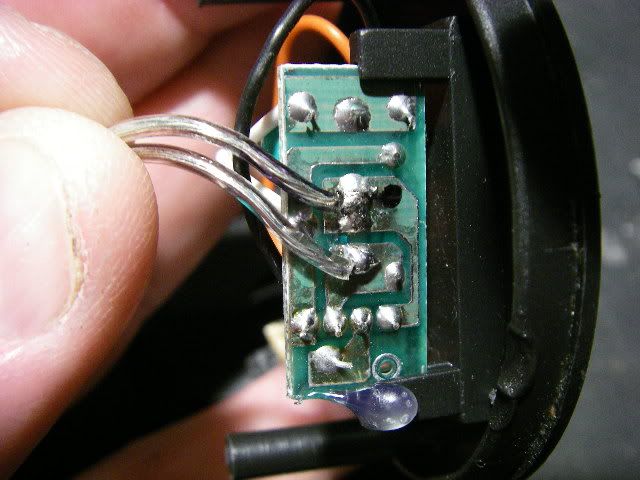
Note the polarity of the original LED in the solar light and desolder it or just chop it off. The negative is normally the anvil shaped reflector inside the LED.
Now simply solder the LED string across the pads the original LED was connected to.

Assemble the solar module back together as much as you want. I left mine quite skeletal. Turn the solar module switch on and when you cover the solar cell completely the LEDs should glow dimly. If they don't then it may need charged in sunlight for a while, or you may have connected the LED string round the wrong way (Just reverse it if you have).
Note how I'm holding the module at an angle. When you mount it in the window area you want the cell to be angled diagonaly through the window, pointing at a clear area of sky that the sun passes over. Doing this will result in MUCH more solar energy being harvested, and result in a longer run time each night for the LEDs.
And that's it. A simple string of LED lights to lay along your windowsill or drape over a small plant.